
 chibiham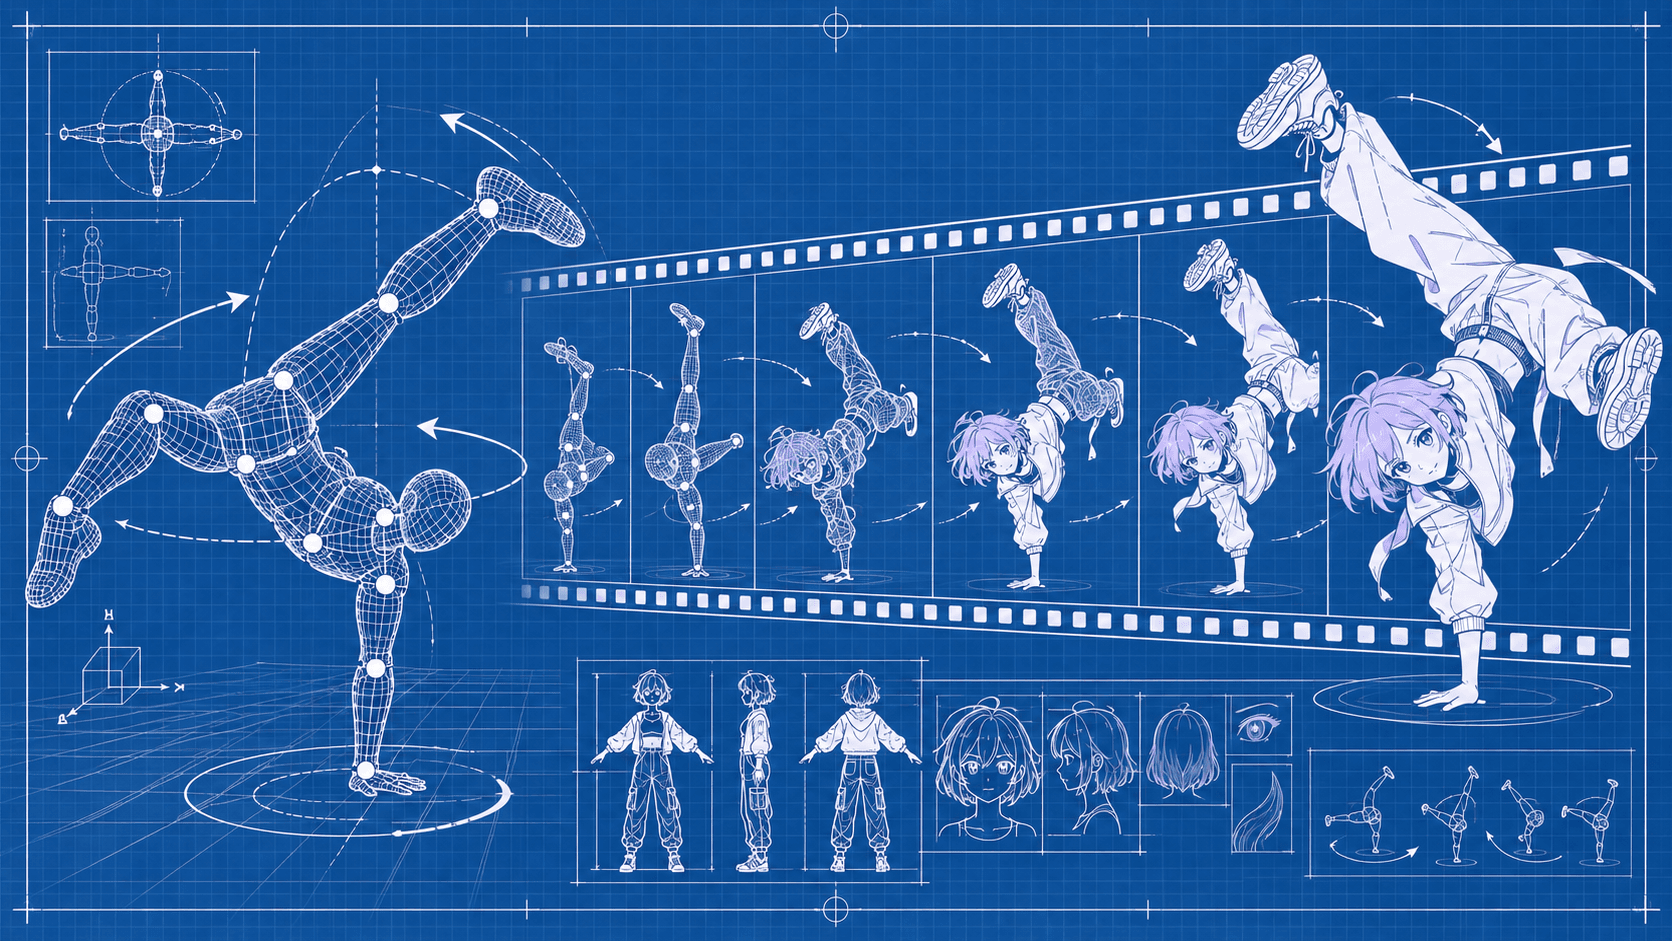
I had a 12-frame dance drawing made with ChatGPT and thought it would be nice to add frames and motion blur to turn it into an animation. That casual idea took about three days and ended with my own character (Chibiham-chan) breakdancing. I rebuilt the approach nearly 15 times.
The short version: splitting the work so that "precise 3D data decides the motion, and image generation AI only does the drawing" worked well. But handstands and poses where an arm crosses the face never became stable. Image generation AI has strong habits: it wants to show the face, and it wants to put the body back into a normal posture.
Tools: OpenAI Codex image generation, ComfyUI at home (Qwen-Image 2.1, MiniMax H3), Mixamo motion capture, Blender, OpenCV and pose estimation, and ffmpeg. Everything was orchestrated through conversation with Claude Code; all I did was look at the results and say "meh" or "nice."
Animating the 12-frame drawing
First I had it draw 24 frames on a single sheet, but at about 256px per frame the continuity was unreadable. Drawing one frame at a time connected the motion, but the head position and size drifted every frame, causing jitter. Smoothing the trajectory in post-processing made the feet slide instead. Without knowing where the head actually belonged, I was just pulling it toward the assumption that "it should be smooth."
So I split the roles: a video generation model (MiniMax H3) drafts the motion, and Codex cleans up each frame into anime art.
The blur kept landing on parts that weren't moving. So I computed per-part motion and handed over a "motion map": moving parts painted red, with arrows showing direction. The instruction: "blur only the red parts; keep everything else sharp."
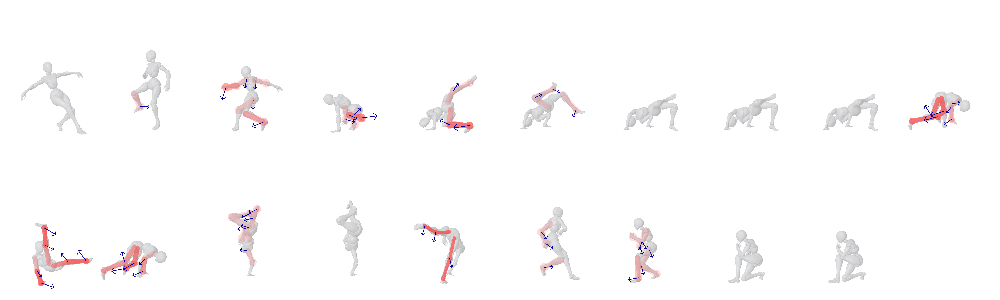 The "motion map" given to the clean-up model. Only fast-moving limbs are painted red, with blue arrows for direction (from the Mixamo version described below)
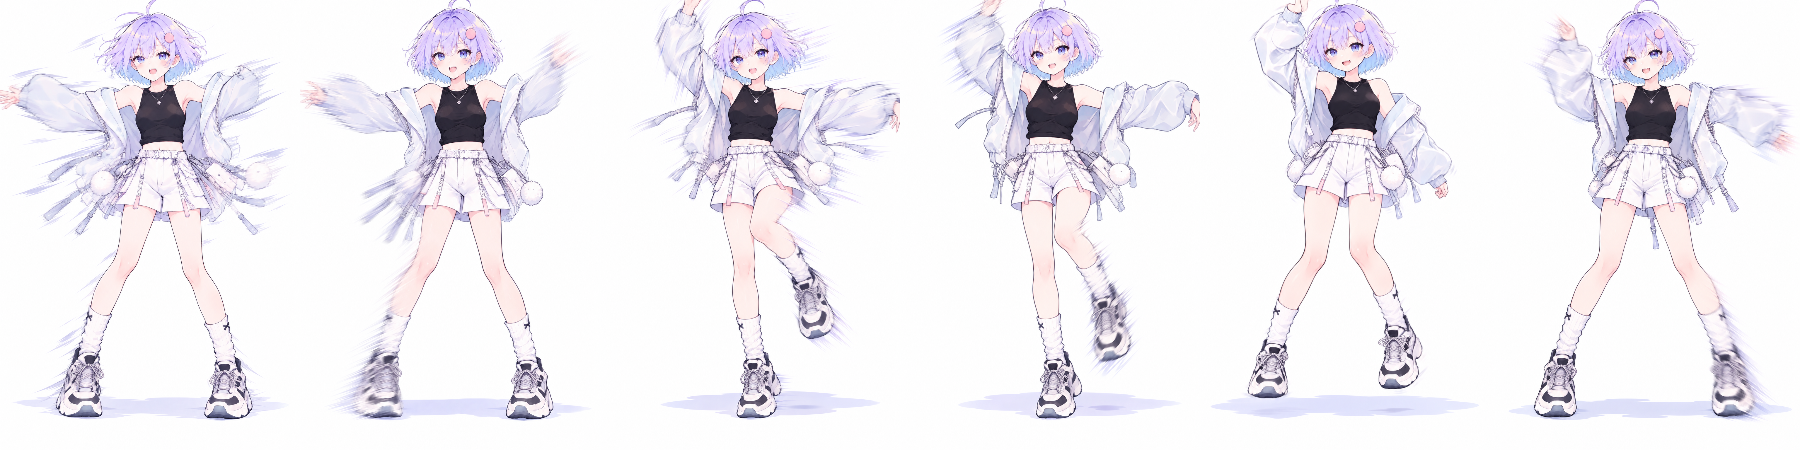 Left: the model guessed. Right: given the motion map.
Using real motion as the underlay
The original motion was slow to begin with, so I used a live-action breakdance video as the underlay. Pose estimation gives joints for every frame, so the cleaned-up frames can be aligned to the source video's joints. This time there was a ground truth, and the correction simply worked. But since it's someone else's post, I can't publish it.
I also tried making it dance with video generation alone, but it just morphed smoothly between poses and never produced a spinning move.
In the end, I chained four Mixamo motion-capture clips (free, commercial use allowed) in Blender into a roughly 9.5-second dance. Blender can export exact joint coordinates for every frame, so the motion map, pose descriptions, alignment, and failure detection all ran on exact data instead of estimates.
Frame-to-frame consistency
From here on, the fight was "the motion is exact, but the drawing wobbles from frame to frame." Three things helped.
- Draw every frame in order in a single Codex session: until then I'd launched a fresh session per frame. Continuing in one session lets the model remember previous frames, and frame-to-frame size change dropped from 15% to 6.6%
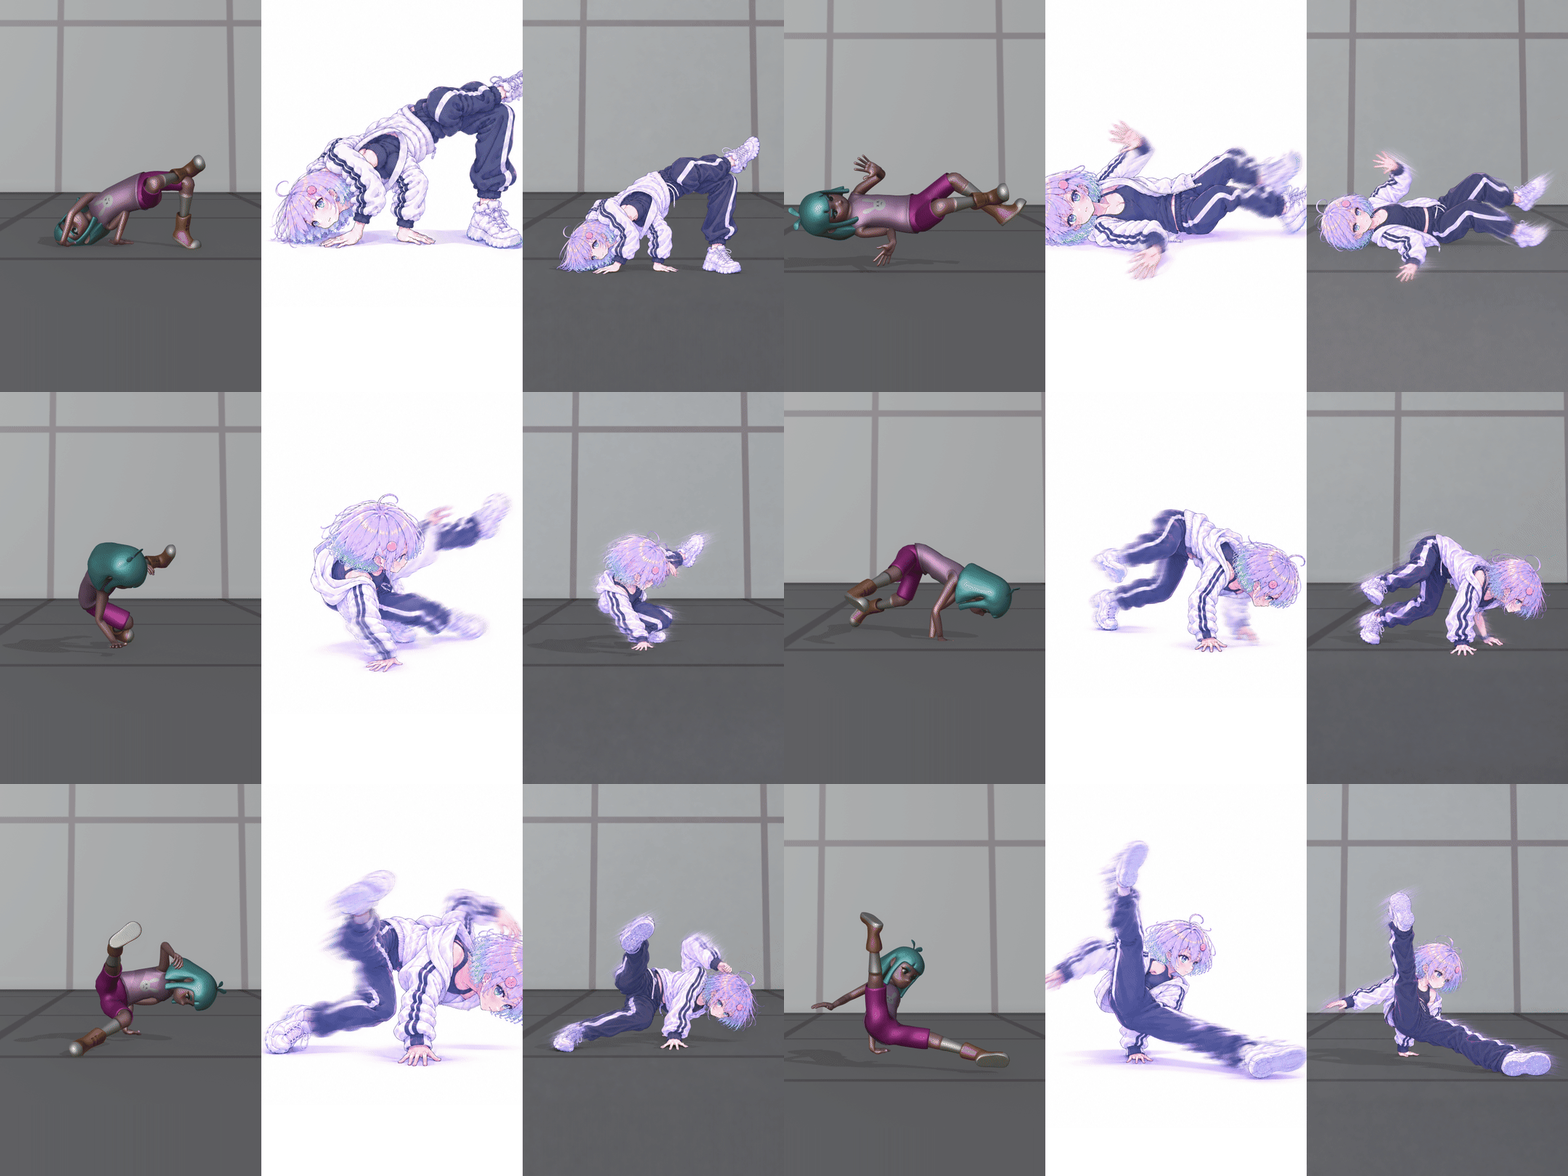
- A mannequin color-coded by body part: with a solid gray mannequin, overlapping limbs make left/right and front/back ambiguous. Color coding plus eye and nose markers on the face conveyed which limb is which and where the face points
- A grid background: a white canvas has no reference for size. Rendering a grid floor and wall and saying "draw at the same size on this grid" cut the size wobble nearly in half
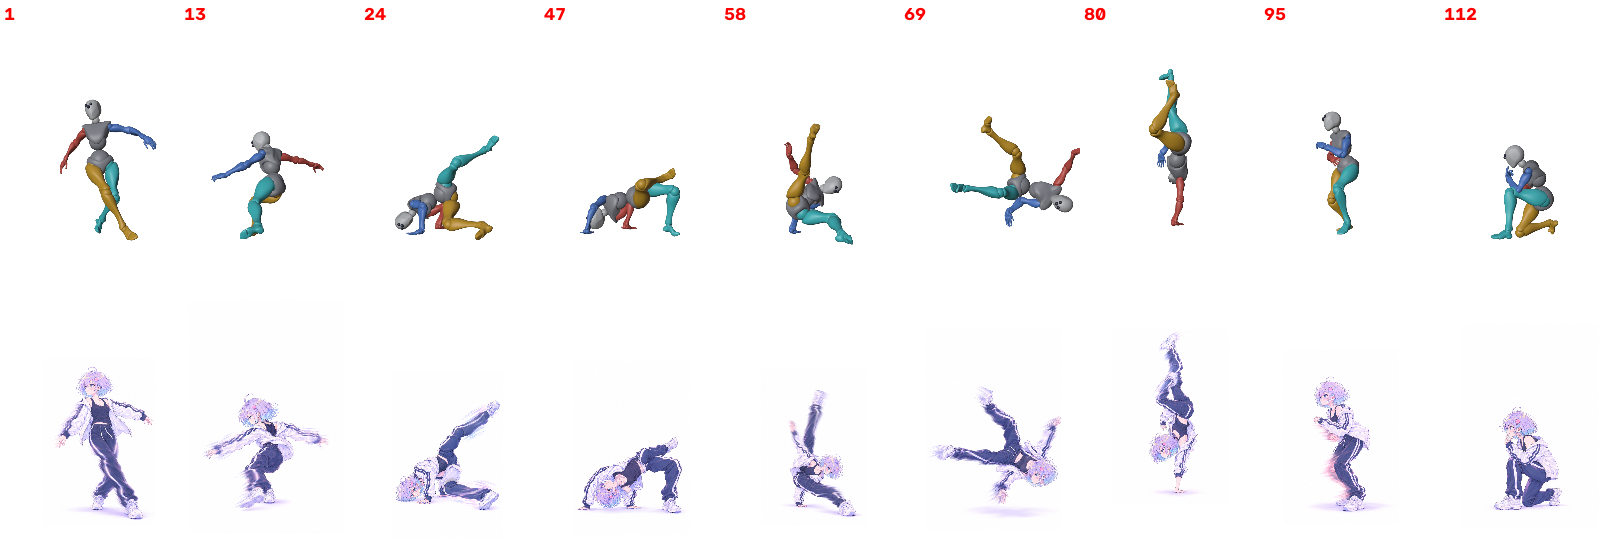 Top: color-coded mannequin. Bottom: clean-up. Numbers are frame indices
 From left: reference, white background, grid background
I also tried Qwen-Image 2.1 locally. img2img and ControlNet conveyed the rough pose, but for locking down an exact pose it didn't beat Codex.
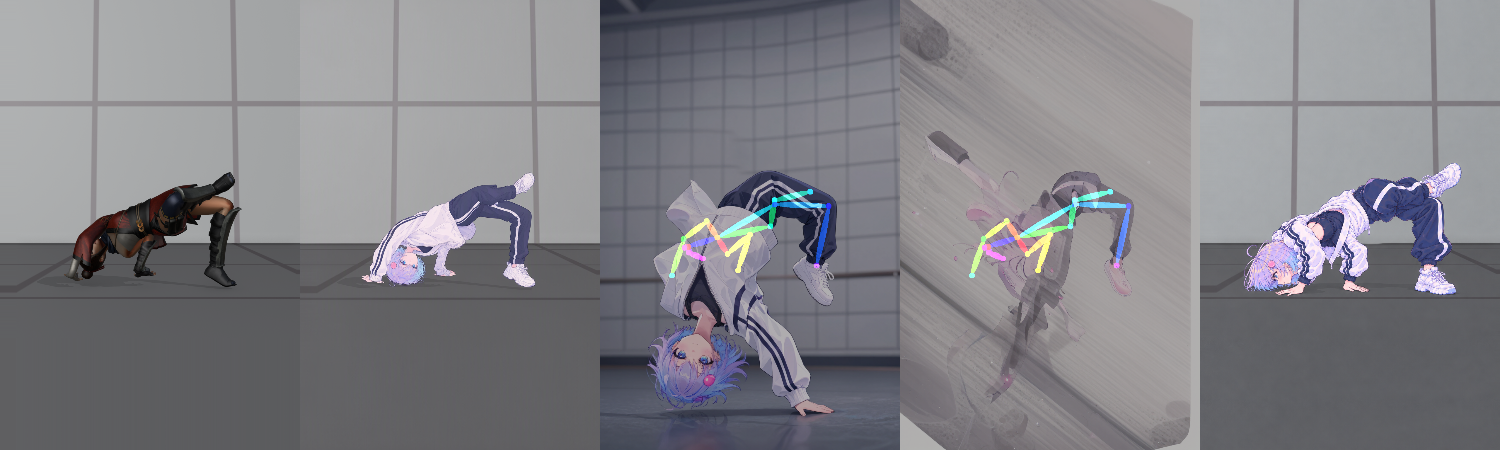 From left: reference, Qwen img2img, Qwen + ControlNet (strength 1.0, 2.0), Codex grid version
What I learned
Leave only the drawing to generative AI. My first mistake was giving image generation AI both the drawing and the motion. Moving the motion into 3D data and narrowing the AI's job to drawing was the most stable setup.
Replace implicit inference with explicit input. Progress always came from turning something the AI had been guessing into an input: what moves → motion map, which limb → color coding, size → grid, what was drawn before → same-session context. It's close to a director scribbling arrows on a storyboard.
Correction only works when there's a ground truth. The same scale-and-translate operation failed when aligned to "it should be smooth" and succeeded when aligned to observed joints. It's the difference between regularization with no constraints and a problem with boundary conditions.
Prior-distribution habits don't yield to instructions. Even when the face points at the floor, the generated drawing turns it toward the viewer. An upside-down body flips back head-up. Most training data is "a person standing and facing the camera," so that's no surprise. Writing "don't show the face" barely helps.
Closing
Progress always started where I said "something's off." The work was putting that feeling into words and replacing, one at a time, the parts the AI had been guessing with explicit inputs.
The last remaining "urge to show the face" was beyond the reach of that replacement — it's the model's prior distribution itself. How much can be constrained through input, and where does the model's limit begin? Seeing that boundary was the biggest takeaway from these three days.